Image may be NSFW.
Clik here to view.
Ever since we moved into our home 2 years ago (wow!) I’ve loathed the fireplace. The rustic stones are not in line with my modern and clean aesthetic but part of me would hate to remove them since they’re a {crumbling and cracked} part of the original home’s charm that future buyers may hate us for removing. We did do away with the stone planter made from the same stones and I don’t feel any guilt about that since it was sloppily made, looked weird, and took up precious space.
Image may be NSFW.
Clik here to view.
I’ve considered covering the stones, whitewashing them, and have finally decided that instead of changing the stones, why not try updating the fireplace opening? That led me down the Pinterest wormhole and Google searches for “modern fireplace screen” that resulted in tons of pins for expensive options. For some reason modern=expensive across the board and buying an $800 screen wasn’t in the budget. Other pins were to stack items in the fireplace such as books or wood. I loved the look of stacked wood but it would then be a non-functioning fireplace. Then I finally found the answer in a DIY from Pepper Design Blog that was also featured in This Old House. I pined (get it? lol) for a white wood such as birch but around here I haven’t seen any. After looking to buy slices (very pricey) I finally just decided to stick with native Florida woods. I posted to Craigslist offering a small sum for pre-sliced wood and a lovely guy met me with a huge bag of slices in varying sizes, lengths, and woods. There is white oak, oak, fir, and cypress in our final result.
Clik here to view.

Before- old screen that came with the house
The process for my screen seemed to be more difficult than the original for several reasons. 1. My fireplace has uneven rocks all round the opening, including the floor. Getting a perfect piece of wood sized to fit was impossible to slide in over and past those bumps. I went in and out 8 times from the fireplace to garage to saw off more areas to make it fit. 2. The fireplace slants inside so I had to cut each side at an angle (like mitering moudling) for a better fit. 3. I wound up glueing one slice past the edge which caused more heartache than I can express. 10 minutes with a saw, dripping sweat, cursing, kicking, and bloody knuckles solved it. Then it fell off after previous tries to just pry it off failed. I wish I were kidding.
Clik here to view.

The dry fitting was perfect…
Clik here to view.

Each slice was glued down
Clik here to view.

A notch had to be shaved off with a knife in order to make this slide past. And a few kicks.
Clik here to view.

This was how it was wedged, seemingly stuck forever on the slice that needed to be cut.
All in all I spent less than $80 buying a large plywood sturdy enough not to bend under the weight of the slices which was $22 at Home Depot, $3.97 for a matte black spray paint (I could have used my leftover chalkboard paint but i was too lazy to brush it), I paid for the slices of wood (more for labor than the wood which is so often free around here), the large bottle of Gorilla wood glue was $6, and I shaved a few years off my life. The cleaner front of the fireplace has been worth it though! Due to the differences in my fireplace shape and being set back a little more it is easier to figure out this is a black board, but eh. I also dig the varied sizes and textures though I also like the cleaner look at the version from Pepper Design Blog.
Image may be NSFW.
Clik here to view.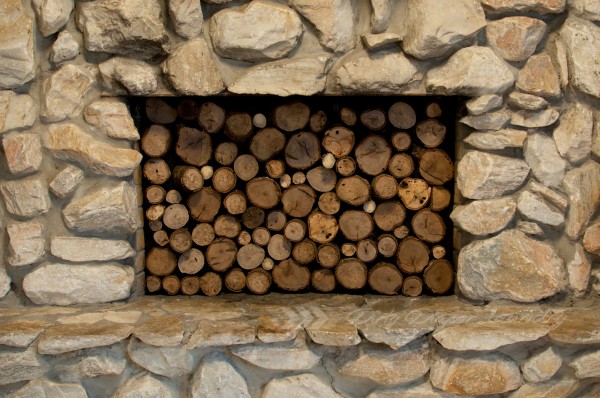 Image may be NSFW.
Clik here to view.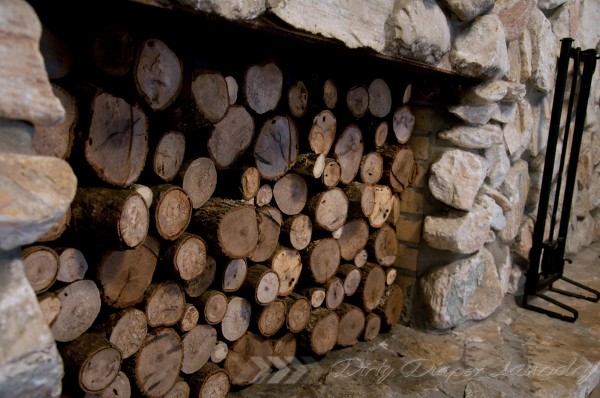 Image may be NSFW.
Clik here to view.
You may notice we are missing the coffee table and red tulip style stool (seen on Instagram). Those are in the other living room with our new recovered turquoise sectional. This room is eventually going to house a pool table (we are going to look at one next week that is mid century so it pleases me) that my husband has always dreamed of. That, along with the turntable console and mid century bar will make this a very groovy space for entertaining! Just don’t ask me to move this damn screen, it is wedged in there tighter than I had hoped… uh oh…. Santa will have to enter with a magic key in the front.
Pin It

