
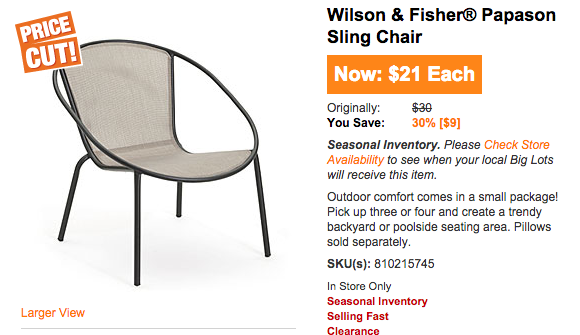
DDL readers know that when I’m not blogging about all things cloth diapers I’m working on my home. I love decorating for less and so far I’ve paid more attention to the inside than the outside. When Big Lots had a super sale on their patio furniture I decided I was going to buy the mid century style “hoop” chairs I’d been eying. I figured I had nothing to lose. The chairs had SO MUCH POTENTIAL but the tan was womp womp. One trip to Home Depot later and I was ready to JUMP IN. I’d never painted the webbing on a patio chair and wasn’t sure how it would turn out but let me tell you… I’m a GENIUS.

All it took was 1 can of paint to make this chair live up to the shape it was given. Thank you Big Lots… thank you Home Depot. New “mid century modern inspired hoop chairs” can be several hundred dollars. No, mine isn’t perfect but it has the look I love at a price I can handle.
Supplies Needed:
- Chair to Paint (mine is the Wilson and Fisher papasan chair from BigLots. It was only $16 at my local store for summer clear out but you could apply this technique to any similar chair with nylon webbing.)
- 1 Can of Spray Paint (color for webbing)
- 1 Can of Spray Paint (black for covering mistakes, optional)
- Painter’s Tape
- Saran Wrap
- Old, Clean Paint Brushes

DIY Instructions:
It is as easy as it looks but I’ll walk you through how I did it and what gave me the best results.

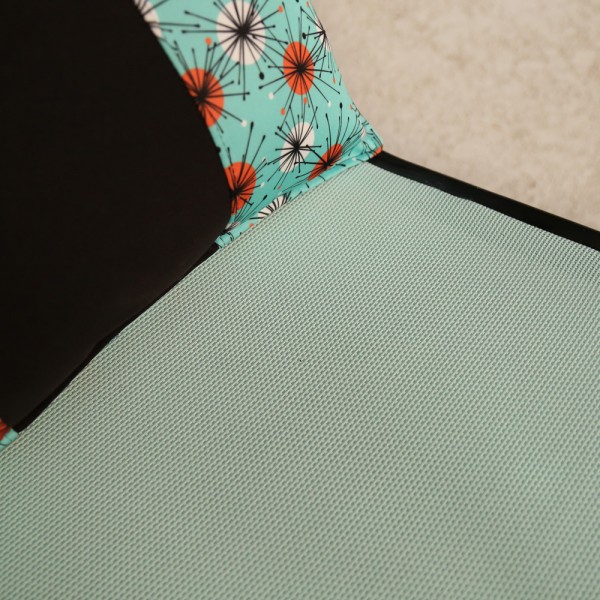
Prep your surface! Starting with clean, dry chairs, tape off what you don’t want painted. As tempting as it was to paint the whole thing I really wanted a two-tone look like the $250 chair shown above. I used small pieces of tape around the curves. I also used strips of saran wrap to cover the legs and the rod behind the seat and taped those on. I tapes off the back as well, but not as carefully, in order to paint the back too.

Start Painting! Use your chosen color of paint. I picked one that says it works with plastics because the webbing is a nylon, not canvas, and I wanted to be sure it bonded. Start spraying but do a light coat all over the front and even the back side. It won’t look even after 1-2 light coats and that’s ok. Using your paint brush stroke everywhere you painted. This step after each coat is what I think made it come out so nice. My first chair looks more “painted” than my second because I only brushed on the last coat. My last chair looks like it came from the factory in that color!

You will want to do 3 coats on the front and 1-2 on the back. Brush after each coat. Let dry between coats. (the above image really shows the mistakes I made before touching them up!)
Touch-up time! When you’re satisfied with the look and it’s dry remove the tape and wrapping. Here is where you may find some mistakes and that’s ok! My tape pulled up in some spots leaving me with paint on the metal. Oh boo! If this is the case it’s fixable. Take black spray paint and a paint brush. Spray some paint onto the brush tip and touch up where needed.
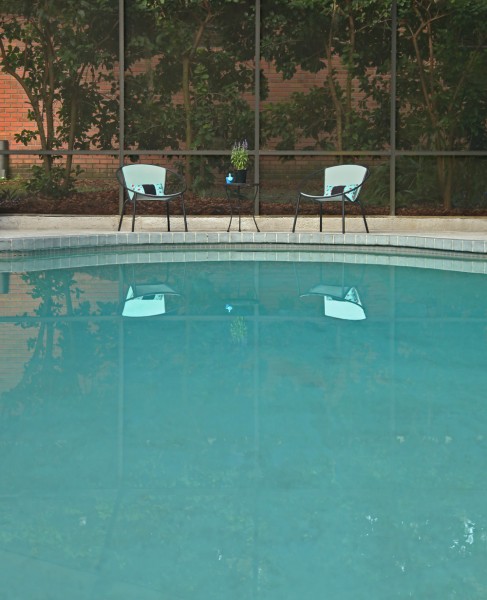
That’s it! You have stylish chairs for way less than most modern patio furniture. These chairs would look amazing in other retro inspired colors too like an orange or a darker turquoise. I used Ocean Mist. The total cost for this project (both chairs) was $38 with the new paint color! I already had a can of black paint. Hurry over the Big Lots before they sell out of these fun chairs until next summer!
Pin It

